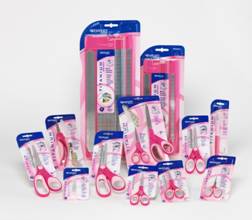
Westcott Brand is the official sponsor of the Designer Crafts Connection Blog Hop this month. With the support of Velcro Brand Fasteners and The Duck Brand, our project challenge is simply... “PINK,” in honor of Breast Cancer Awareness Month. I’m proud to be one of 33 designer’s who were asked to use their tools and materials to create one-of-a-kind projects to show-off their products. I’ve made two projects to share with you; a scissor organizer and a “Hello Titty” purse. (You’ll just have to read the story!)
It will be worth it to read all the way to the end of this post, where you will find the details about a very exciting giveaway! Then use the icon to the right of this post to hop your way along to visit the other designers work.
Chair-back Scissor Organizer
Having the right tool at your finger-tips is important. If you’re like me, you’re always looking for those elusive scissors! You know... the ones that would work perfectly for the task at hand... I know they’re here somewhere! I decided to solve that problem by creating an organizer to hang on the back of my desk chair. With such a great selection of Westcott Brand® Cutting Tools I’ll always have the perfect tool at arms reach... now if I can just train myself to put them back after I use them!
Here is a snapshot of the tools and materials I used to create my project. I added some left-over fabric, buttons and thread to what we were given for the challenge.

How to...
1. Determine the size you'll want your chair-back organizer. Mine was approximately 16" x 12" rectangle. Cut two rectangles from fabric remnant, adding 1/2" to all sides.

2. Cut two velcro strips the width of the organizer; pin the hook side of VELCRO® Brand Hook and Loop Fasteners in place across the width of the right side of one of the rectangles, spacing as desired. Stitch in place using a sew machine straight stitch at the edges of the velcro.

3. Determine the length of straps needed by measuring chair back. Mine were approx. 14" long. Cut 4 strips; pin and stitch with right sides together and stitching to a point at one end and leaving the opposite end open for turning. Trim seams, turn strips and press. Top stitch around all edges.

4. Pin raw edge of straps to top edge of right side of front rectangle. Pin right sides of rectangles together. Stitch together leaving a 4" opening at bottom; trim corners, turn and press into place. Stitch opening closed and Top stitch around all edges.

5. Stitch large buttons onto ends of straps.

6. Cut two 1" pieces of VELCRO® Brand Sticky Back Hook and Loop Fasteners. Adhere hook side on straps on back-side directly under buttons. Adhere loop side of VELCRO along top edge of organizer under strap.


7. Measure and cut 1/2" wide ribbon the width of the organizer plus 4" extra. Cut the same length of the loop side of VELCRO® Brand Hook and Loop Fasteners. Pin and stitch the VELCRO to the back-side of the ribbon along the edges.
8. Decide how you would like to organize your cutting tools by laying them in place on the organizer. Lay the VELCRO backed ribbon over the scissors allowing "wiggle" room for easy removal. Stitch reinforcement stitches near each side of your scissors. (Note: these stitches may not be needed depending on the strength of the VELCRO product you choose to use.)

Hello "Titty" Purse
In case there is anyone in the universe haven't told... I have this little Granddaughter ... at 21 mos old she's quite the talker, but her words don't always come out exactly as you expect. My DIL had just texted me that Grace calls Kitties, "Titties" when my box of The Duck Brand® Patterned Duct Tape Rolls arrived on my doorstep. Knowing this Breast Cancer Awareness "PINK" challenge was on the horizon, I busted out laughing when I saw that the box contained "Hello Kitty" Duck Tape! Perfect timing to make my little lady a "Hello Titty" Purse! Thank you, Grace for always being such an inspiration to your Grammy!


I came across this video on the internet and it inspired the purse I made and will be sending to Grace. As you'll see, I modified the basic instructions by folding the Duck Tape "Fabric in thirds to create a flap over the purse.


Now that you've read through my long post, here are the links to the details about the Online Promotion/Giveaway: http://www.facebook.com/WestcottBrand and http://westcottbrand.blogspot.com/ http://www.facebook.com/velcrobrand & http://www.facebook.com/ducktape) The giveaway winner will receive a Deluxe Assortment of Westcott Cutting Tools (assortment may vary). In order to be eligible to win, you must comment on the DCC Blog Hop Post on http://westcottbrand.blogspot.com/ prior to November 1st. Westcott Brand will choose/announce the random giveaway winner on November 1st!