

Wednesday, August 24, 2011
Superheros!
Kids have always been my favorite people. And I'm so thankful to have a whole bunch of the most darling little ones in my life. My sweet little granddaughter, Grace (the most beautiful 20 month old child in the universe :), enjoys playing dress-up. Her Daddy sends me pictures of her wearing cock-eyed hats and socks on her hands and always a proud grin on her little face. I thought it would be fun to make Grace and all her little friends superhero capes. Her little second cousins need capes, too, so I made a whole batch! When her Daddy was little I made "Kid Terrific" capes for him and his friends with the same logos. I can't wait to see them all wearing these while running around the park! They even have Super Power magic magnetic fasteners!


Thursday, June 30, 2011
Designer's Craft Connection: iLove to Create challenge
Fun new product!
For this month’s challenge, the Designer’s Craft Connection has partnered up with iLovetoCreate for a new product challenge! Thirty of us were provided with a fun new product called, Beads in a Bottle by Tulip. We’ve each created a unique project to share with all of our readers. On July 1st, start here and then use the link in my side-bar to hop along to the next fabulous design!
I love to leave a little somethin’ behind when I’m visiting family or have stopped by to visit at a friend’s home. When I was dreaming up something fun and unique to do with the Beads in a Bottle, I thought of these sweet little message stones and how much fun it would be to tuck one here and there under the leaves in a potted plant or in a garden amongst the basil. Finding one of these, when you least expect it, would surely put a smile on your face!


Materials:
*Beads in a Bottle by Tulip
*Flat stones
*Krylon Indoor/Outdoor spray paint in light colors
*Krylon Chalkboard spraypaint
*Permanent marker
*Chalk
Instructions:
1. Clean and dry flat stones
2. Spray paint stones with Krylon spray paints and/or chalkboard paint; allow to dry.
3. Embelllish stones with Beads in a Bottle leaving space in the center for message; allow to dry.
4. Use permanent marker to write message or inspirational word on face of stone. Use chalk to write erasable message on stones painted with chalkboard paint.
iLove to Create has generously offered a giant giveaway to a lucky follower of the Designer’s Craft Connection blog hop. Check here http://ilovetocreateblog.blogspot.com/2011/06/beads-in-bottle-blog-hop.html
Visit here for all the details about how you can enter for a chance at this amazing stack of creative goodness!
For more BEADS in a BOTTLE inspiration be sure to check out their video here.

Thanks for stopping by!
For this month’s challenge, the Designer’s Craft Connection has partnered up with iLovetoCreate for a new product challenge! Thirty of us were provided with a fun new product called, Beads in a Bottle by Tulip. We’ve each created a unique project to share with all of our readers. On July 1st, start here and then use the link in my side-bar to hop along to the next fabulous design!
I love to leave a little somethin’ behind when I’m visiting family or have stopped by to visit at a friend’s home. When I was dreaming up something fun and unique to do with the Beads in a Bottle, I thought of these sweet little message stones and how much fun it would be to tuck one here and there under the leaves in a potted plant or in a garden amongst the basil. Finding one of these, when you least expect it, would surely put a smile on your face!


Materials:
*Beads in a Bottle by Tulip
*Flat stones
*Krylon Indoor/Outdoor spray paint in light colors
*Krylon Chalkboard spraypaint
*Permanent marker
*Chalk
Instructions:
1. Clean and dry flat stones
2. Spray paint stones with Krylon spray paints and/or chalkboard paint; allow to dry.
3. Embelllish stones with Beads in a Bottle leaving space in the center for message; allow to dry.
4. Use permanent marker to write message or inspirational word on face of stone. Use chalk to write erasable message on stones painted with chalkboard paint.
iLove to Create has generously offered a giant giveaway to a lucky follower of the Designer’s Craft Connection blog hop. Check here http://ilovetocreateblog.blogspot.com/2011/06/beads-in-bottle-blog-hop.html

Visit here for all the details about how you can enter for a chance at this amazing stack of creative goodness!
For more BEADS in a BOTTLE inspiration be sure to check out their video here.

Thanks for stopping by!
Saturday, March 12, 2011
Weddings Galore!
This is a big summer for weddings! We have THREE, amongst our special friends, all in the course of one month... then, of course, there's that one on the other side of the "pond." When the team for the Designer Craft Connection decided weddings would be our theme for this month's blog-hop, I was delighted! As we "speak" I'm in the process of creating proto-types for two sets of wedding invitations I'll be making over the next few weeks. I also have the honor of creating three hand-bound and stitched wedding guest books for the events I mentioned before. (Not the royal wedding, mind you, the other three!)
A couple years ago our son, Chris, married our beautiful daughter-in-LOVE, Sarah. It was truly one of the most joyous days of my life! We are crafty people (the good kind of crafty), so much of the wedding was DIY. Sarah made her own table decorations, her bridesmaids did her floral arrangements and bouquets, Sarah's Mom decorated their cake and they allowed my hubby and I the great honor of creating many other items for the wedding. We made their Save-the-Date cards, their invitations, ceremony programs, aisle decorations, guest book, and garter. I think the day was extra sweet, especially with all of the personal touches that went into it!
Here are a few pix of this blessed event...
The happy couple near the end of their wedding reception.

The assembly line for the 200 invitations!

You don't quite understand how many 200 is until you start addressing and stamping those puppies!

The programs for their ceremony were embellished with an arrow though a heart, which was symbolic because Chris is an archer.

I had the honor of making Sarah's garter, which is a very special tradition in our family. It was her something blue and included a button from my wedding dress. Stitched inside were two pennies, each from the birth year of the bride and groom, just as my grandmother did in mine. The pink garter is a purchased one for tossing.

The handsome groom and his very proud Mom!

One of MANY kisses!

The hand-bound guest book I made for them, included a photo printed on canvas for the cover. We had a photographer take a black and white photo of each guest/couple/family who attended and they wrote a note on a separate piece of paper that had been pre-printed with a journalling block. The photos were later printed and added to the book with the note for the attendees. There are extra pages in the back of the book to be used at future milestone anniversary parties.

(Pardon my teeny pictures... long story short... computer issues)
A couple years ago our son, Chris, married our beautiful daughter-in-LOVE, Sarah. It was truly one of the most joyous days of my life! We are crafty people (the good kind of crafty), so much of the wedding was DIY. Sarah made her own table decorations, her bridesmaids did her floral arrangements and bouquets, Sarah's Mom decorated their cake and they allowed my hubby and I the great honor of creating many other items for the wedding. We made their Save-the-Date cards, their invitations, ceremony programs, aisle decorations, guest book, and garter. I think the day was extra sweet, especially with all of the personal touches that went into it!
Here are a few pix of this blessed event...
The happy couple near the end of their wedding reception.

The assembly line for the 200 invitations!

You don't quite understand how many 200 is until you start addressing and stamping those puppies!

The programs for their ceremony were embellished with an arrow though a heart, which was symbolic because Chris is an archer.

I had the honor of making Sarah's garter, which is a very special tradition in our family. It was her something blue and included a button from my wedding dress. Stitched inside were two pennies, each from the birth year of the bride and groom, just as my grandmother did in mine. The pink garter is a purchased one for tossing.

The handsome groom and his very proud Mom!

One of MANY kisses!

The hand-bound guest book I made for them, included a photo printed on canvas for the cover. We had a photographer take a black and white photo of each guest/couple/family who attended and they wrote a note on a separate piece of paper that had been pre-printed with a journalling block. The photos were later printed and added to the book with the note for the attendees. There are extra pages in the back of the book to be used at future milestone anniversary parties.

(Pardon my teeny pictures... long story short... computer issues)
Thursday, March 3, 2011
Designer's Craft Connection

So inspired by the blog-hop we participated in a few months back, several designers decided to keep it going! With our blogs linked together by the widget in our sidebars you can easily move back and forth through the series of participating blogs.
Every month, beginning on March 13th, we'll be posting something handmade or inspired by a specific theme. With wedding season fast approaching and a certain royal wedding in all the news, we decided we'd start with weddings as our very first theme. You can check back on the 13th and move through the series of blogs to peruse many "love"ly designs!
As a kick-off for the exciting Designer's Craft Connection there will be an amazing giveaway... a Cricut Expression! Just hop around the Designer Crafts Connection ring and locate the 9 blogs that are displaying the Cricut bug logo. List them in the comment section of Julie McGuffee’s blog to be entered in the drawing to win!

As part of this exciting kick-off we decided to share a bit about what we saw and/or were inspired by at the recent Craft and Hobby Association Trade Show. Here are a few snapshots of what inspired me and I would I'd like to share with you.


Thursday, February 10, 2011
I hope Michelangelo doesn't mind...
We were gifted with a giant print of Michelangelo's "Creation of Man" as a housewarming gift back in 1999. Over the years, hanging near large windows, this painting faded to blue from the golden browns of its original. I knew I could repurpose the frame and the canvas into something useful. I always have loose photos leaning against framed images, candle holders, against books... basically anywhere I could prop them, so I could see the faces of my loves. Having used chicken wire for lots of other purposes over the years... besides confining chickens... I decided to construct a giant framed "bulletin board" to display all those snapshots.

The before...

After disassembling the painting, I sprayed the frame with a few layers of Krylon Interior/Exterior Paint in Black...

I used wire cutters to cut chicken wire to size and spray painted black...

I sanded the painted frame lightly to add that "I've lived and loved and have stories to tell" sort of feel...

I covered the canvas with a thin layer of batting, then with natural linen; wrapped fabric to backside and secured with a staple gun. I laid painted chicken wire over front of covered canvas and strategically attached it with staples where they would be covered by edge of frame.

I placed canvas back into frame and secured with straps stapled across corners on backside. I used heavy wide ribbon.

Because of the narrow hallway, I couldn't seem to get a photo that did this project justice! I absolutely love having a special place to hang all those pictures of our favorite people! I can't seem to bring myself to taking down all the photo Christmas cards we received this year and our family is in serious "production" mode, so we have loads of adorable faces gracing this project!

To clip the photos in place, I use miniature clothes pins that I inked with Clearsnap Chalk Ink in Chestnut Roan then stamped with a french script stamp with black ink.
It's so much fun to give new life to something old!

The before...

After disassembling the painting, I sprayed the frame with a few layers of Krylon Interior/Exterior Paint in Black...

I used wire cutters to cut chicken wire to size and spray painted black...

I sanded the painted frame lightly to add that "I've lived and loved and have stories to tell" sort of feel...

I covered the canvas with a thin layer of batting, then with natural linen; wrapped fabric to backside and secured with a staple gun. I laid painted chicken wire over front of covered canvas and strategically attached it with staples where they would be covered by edge of frame.
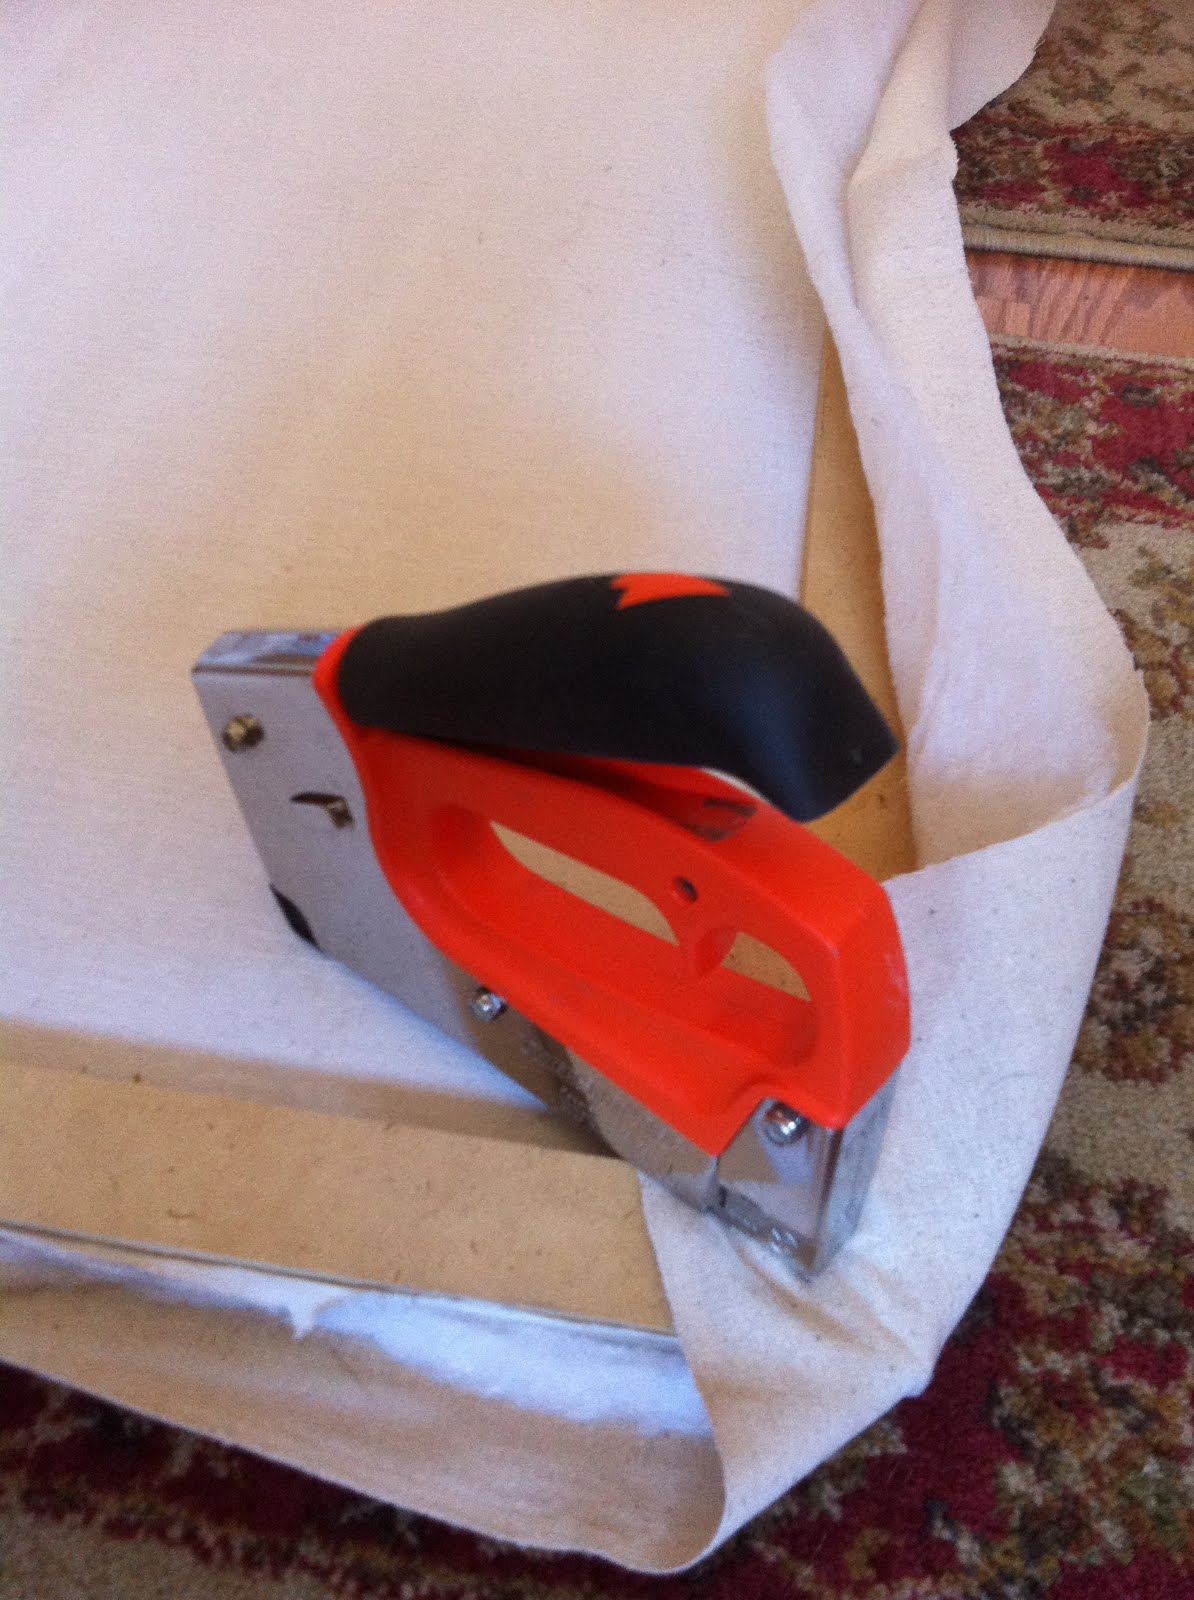
I placed canvas back into frame and secured with straps stapled across corners on backside. I used heavy wide ribbon.

Because of the narrow hallway, I couldn't seem to get a photo that did this project justice! I absolutely love having a special place to hang all those pictures of our favorite people! I can't seem to bring myself to taking down all the photo Christmas cards we received this year and our family is in serious "production" mode, so we have loads of adorable faces gracing this project!

To clip the photos in place, I use miniature clothes pins that I inked with Clearsnap Chalk Ink in Chestnut Roan then stamped with a french script stamp with black ink.
It's so much fun to give new life to something old!
Friday, January 28, 2011
Love Notes Nestled in an Altered Canvas
Here's a little something I whipped up for the Innovations Display at the Craft and Hobby Association Conference and Trade-show Winter 2011
A great company called Lineco, Inc. who sells awesome book binding supplies and kits, sent me some tools and materials to work with for this project and the demo I'm doing in the Craft Studio. I'm posting the basic instructions for this project, just incase you'd like to make one of these for yourself or for your valentine.
This innovative use of an artist canvas provides a clever display for a hand-bound book. The Japanese stab-bound book fits snugly in the center of this altered canvas.

Materials
• Artist Canvas: 6” x 8”
• Test tube
• Vintage book pages
• Soft Gel Medium: matte
• Dry flowers
• Decorative paper: heavy, doubled sided
• Text weight printer paper: 5-10 sheets
• Waxed linen thread: 1 yd (LinecoTM)
• Various rubber stamps and embellishments
• Chalk Inks: (ColorboxTM) in Chestnut Roan and
Warm Red
General Supplies
• Foam brush
• Craft knife
• Awl
• Ruler
• Paper cutter
• Binding needle (LinecoTM)
• Bone folder (LinecoTM)
• Strong adhesive
Instructions
1. Lay canvas upside down on cutting mat. Using sharp craft knife, cut an X through canvas from corner to corner on inside of frame. Fold canvas around inside of frame toward backside and adhere securely.
2. Using a foam brush and gel medium, apply pieces of book pages to completely cover canvas front and sides; allow to dry.
3. Ink edges of canvas and embellish with stamped images and words, as desired.
4. Embellish test tube by wrapping with a narrow strip of inked and stamped vintage text. Position tube on side of canvas securing with several wraps of waxed linen thread. Add embellishments to thread, if desired.
5. Cover backside of canvas with chipboard cut to size. Complete canvas opening by covering exposed chipboard with vintage text.
6. Insert dried flowers into test tube vase. The following instructions are for cutting the covers and pages needed for this project.
Making the Book
1. Measure inside of canvas frame to determine cutting sizes for book covers and pages.
Finished book will measure 1/4” narrower and shorter than opening in center of canvas.
2. Cut two covers from double-sided decorative paper using measurements in step 1 i.e. If opening is 3” x 5” then covers should measure 2 3/4” x 4 3/4.”
3. Cut 15-20 pages from text-weight paper. Cut pages the same width as cover and twice the length. Fold all pages in half and crease with bone folder. (Note: in Asian bindings, the folded pages are opposite the spine, The edges are left folded to strengthen the page.
4. Use an awl to pierce four holes through all pages and book covers, 1/2" from edge and equally spaced across end of book.
5. With binding needle and waxed linen thread stitch book together following the illustrations below.

(These binding instructions are copyrighted by Lineco, Inc. and used with permission for this project.)
A great company called Lineco, Inc. who sells awesome book binding supplies and kits, sent me some tools and materials to work with for this project and the demo I'm doing in the Craft Studio. I'm posting the basic instructions for this project, just incase you'd like to make one of these for yourself or for your valentine.
This innovative use of an artist canvas provides a clever display for a hand-bound book. The Japanese stab-bound book fits snugly in the center of this altered canvas.

Materials
• Artist Canvas: 6” x 8”
• Test tube
• Vintage book pages
• Soft Gel Medium: matte
• Dry flowers
• Decorative paper: heavy, doubled sided
• Text weight printer paper: 5-10 sheets
• Waxed linen thread: 1 yd (LinecoTM)
• Various rubber stamps and embellishments
• Chalk Inks: (ColorboxTM) in Chestnut Roan and
Warm Red
General Supplies
• Foam brush
• Craft knife
• Awl
• Ruler
• Paper cutter
• Binding needle (LinecoTM)
• Bone folder (LinecoTM)
• Strong adhesive
Instructions
1. Lay canvas upside down on cutting mat. Using sharp craft knife, cut an X through canvas from corner to corner on inside of frame. Fold canvas around inside of frame toward backside and adhere securely.
2. Using a foam brush and gel medium, apply pieces of book pages to completely cover canvas front and sides; allow to dry.
3. Ink edges of canvas and embellish with stamped images and words, as desired.
4. Embellish test tube by wrapping with a narrow strip of inked and stamped vintage text. Position tube on side of canvas securing with several wraps of waxed linen thread. Add embellishments to thread, if desired.
5. Cover backside of canvas with chipboard cut to size. Complete canvas opening by covering exposed chipboard with vintage text.
6. Insert dried flowers into test tube vase. The following instructions are for cutting the covers and pages needed for this project.
Making the Book
1. Measure inside of canvas frame to determine cutting sizes for book covers and pages.
Finished book will measure 1/4” narrower and shorter than opening in center of canvas.
2. Cut two covers from double-sided decorative paper using measurements in step 1 i.e. If opening is 3” x 5” then covers should measure 2 3/4” x 4 3/4.”
3. Cut 15-20 pages from text-weight paper. Cut pages the same width as cover and twice the length. Fold all pages in half and crease with bone folder. (Note: in Asian bindings, the folded pages are opposite the spine, The edges are left folded to strengthen the page.
4. Use an awl to pierce four holes through all pages and book covers, 1/2" from edge and equally spaced across end of book.
5. With binding needle and waxed linen thread stitch book together following the illustrations below.

(These binding instructions are copyrighted by Lineco, Inc. and used with permission for this project.)
Monday, January 24, 2011


Subscribe to:
Posts (Atom)